OAuth, which stands for “Open Authorization,” is an open-standard authorization framework that enables third-party applications to access resources on behalf of a resource owner, such as a user, without the need to disclose their credentials. It is commonly used as a way for users to grant access to their information stored on one site to another site, without sharing their login credentials.
The OAuth protocol allows users to delegate access to their resources stored on one platform (known as the resource server) to another application (known as the client) through a process called authorization. This process involves obtaining an access token, which represents the user’s permission to access specific resources, and using it to make authenticated requests to the resource server.
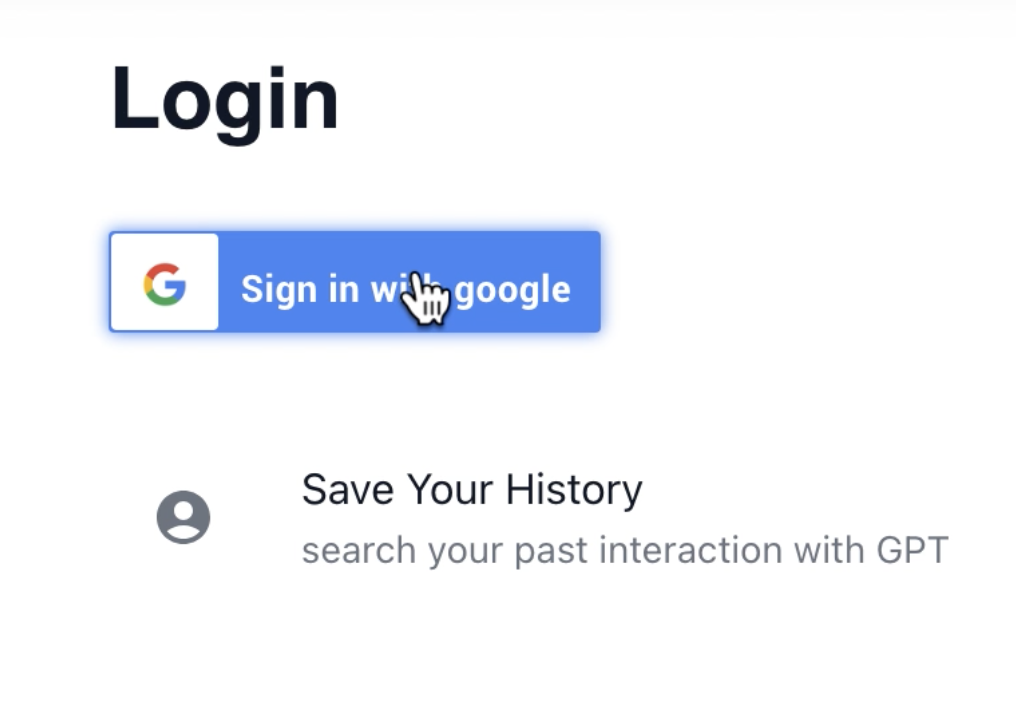
What We Learn
1. How to create oAuth consent screen(where user is asked to provide their private data)
2. What private data we want to pull from google oAuth service.
3. How to get google oAuth credentials.
4. How to setup next-auth api routes at our own backend server.
5. How to use next-auth in the front end client to define a context session provider.
6. How to use the data itself, within react component and render whether if a user is authenticated and can use protected route or user is a guest and need to sign-in.
7. We’ll also learn how to use the authentication service in our other nextjs routes that require authentication for uses who need to access those routes (e.g posting new data only. allowed by authenticated users)
Tech stack
- Javascript
- ReactJS
- nextJS
- mongoDB
- next-auth
We’ll start with generating credentials at google cloud console and we follow with code, let’s start
Create Google oAuth Credentials
before you’ll be able and create an oauth google secret and google id, you’ll need to define a oAuth consent screen
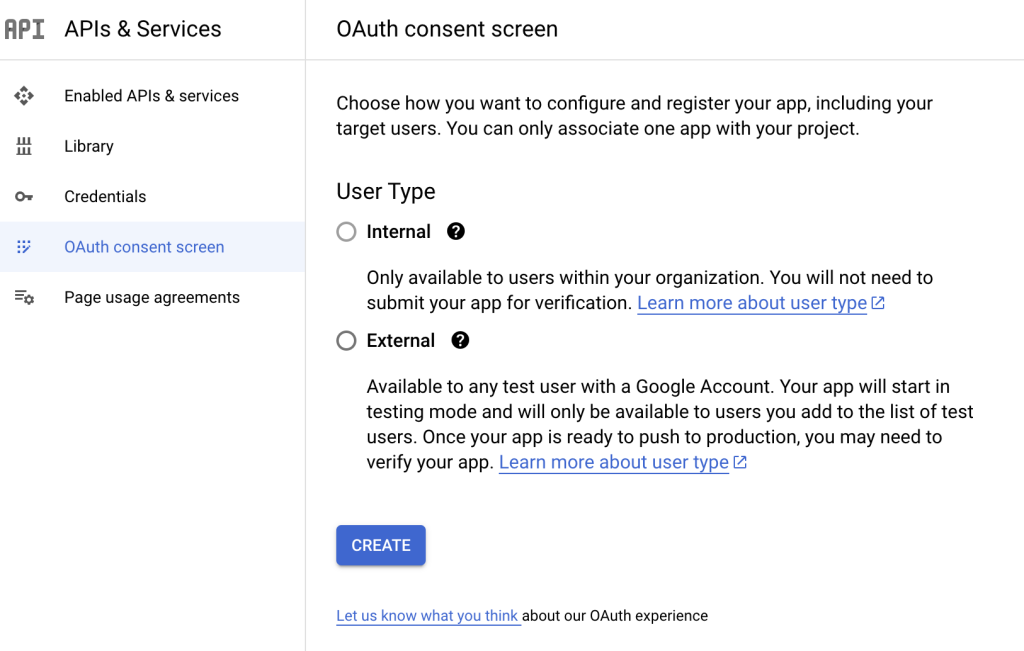
Above external and internal simply means who are the users that allowed to use the oAuth of your web app, since we are in development mode either way is fine, however remember that you’ll need to add emails of other people who want to test your app if you want to share the app with other people as well!
Afterwards you’ll need to add domain and web app name (You can add and edit those at later stage, at oAuth consent screen -> edit app – after you create your app), it’s not a must right now and you can move forward to the next step and than pick “add or remove scopes”. Below scopes are what data the web application asks from incoming users when they signin, you should look and read what those scopes are but for now you can find and pick those 3 scopes below “userinfo.email” and “userinfo.profile” and openid.
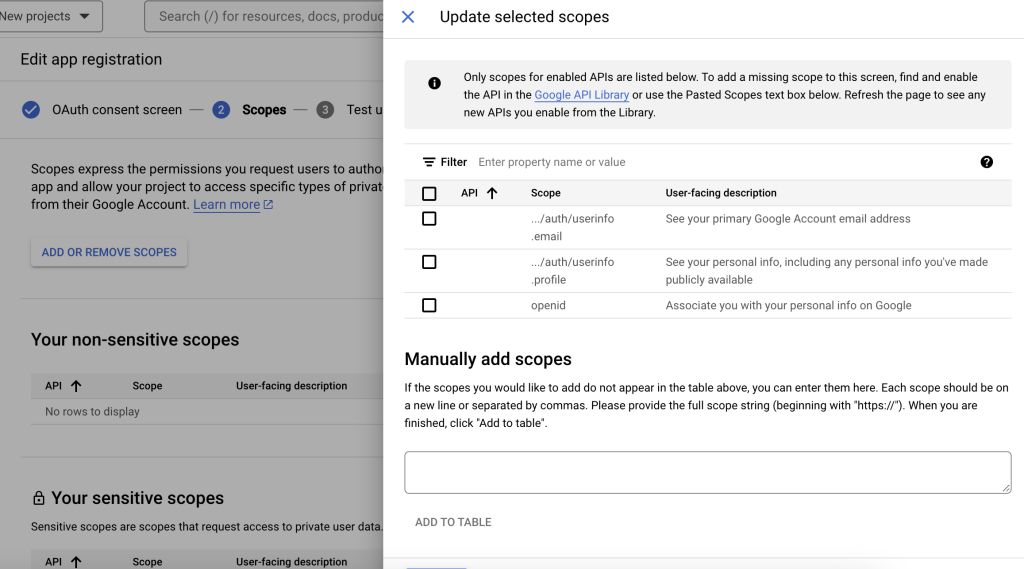
Save and add tests users, See photo below
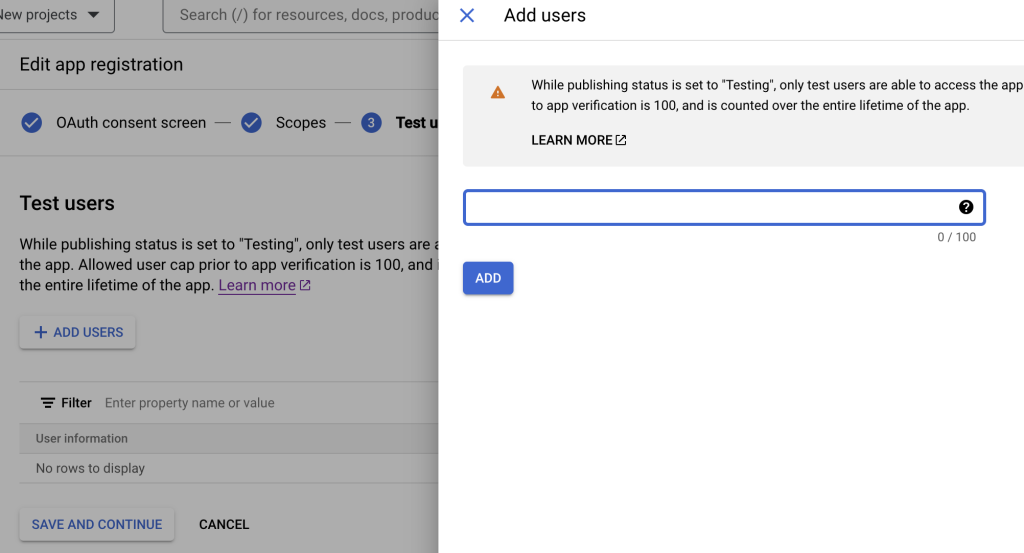
Continue with “save and continue” button below” at than read the summary page and click “back to dashboard”.
Create credentials
Afterwards click “Credentials” at the sidebar menu. click “CREATE CREDENTIALS” at the top and than pick “OAuth client ID” and follow below instrucations.
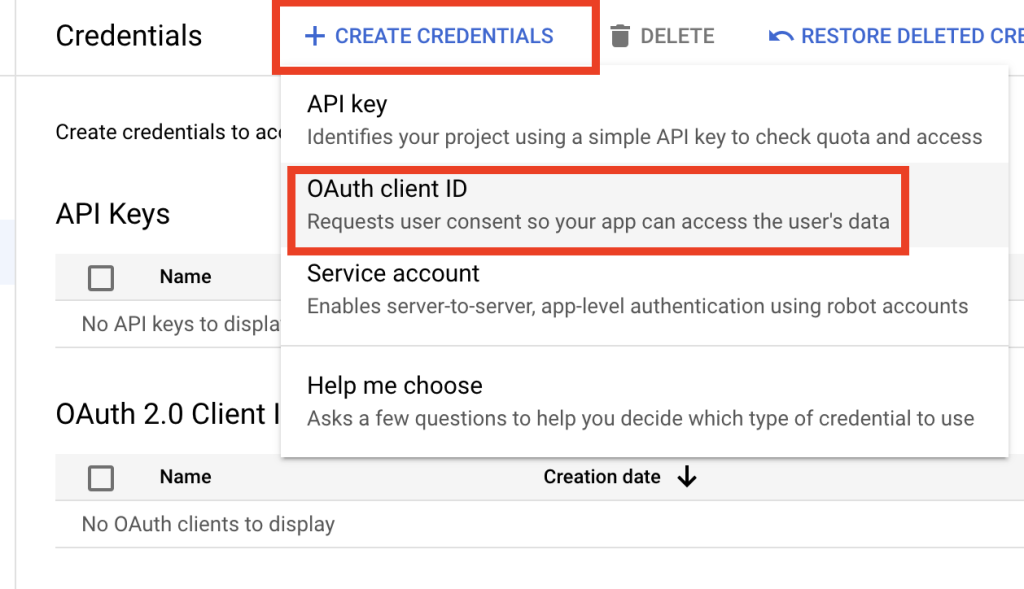
In that screen you’ll config the following information:
name: your name of web application, i’ll call it “my-app dev-local”
Authorized JavaScript origins: which is what domain allowed to executed the provided google code, or the source of the call for the authorisation. example: http://localhost:3103 (our local development domain) or http://my-real-production-domain.com (a real domain).
| Name | Values | Why |
| name | “my web app” | to tell the different between different apps. |
| Authorized JavaScript origins | http://localhost:3103 http://my-real-production-domain.com | which is what domain allowed to executed the provided google code, or the source of the call for the authorisations. |
| Authorized redirect URIs | http://localhost:3103/api/auth/callback/google http://my-real-production-domain.com/api/auth/callback/google | is authorized domain in which google will redirect the user back to. meaning that, we send users to google for authentication, than google send them back to us, With relevant status of the authentication. |
Than click “save” and you’ll get google ID and google secret (keep those in a file locally, you’ll use them in your “dot env” file).
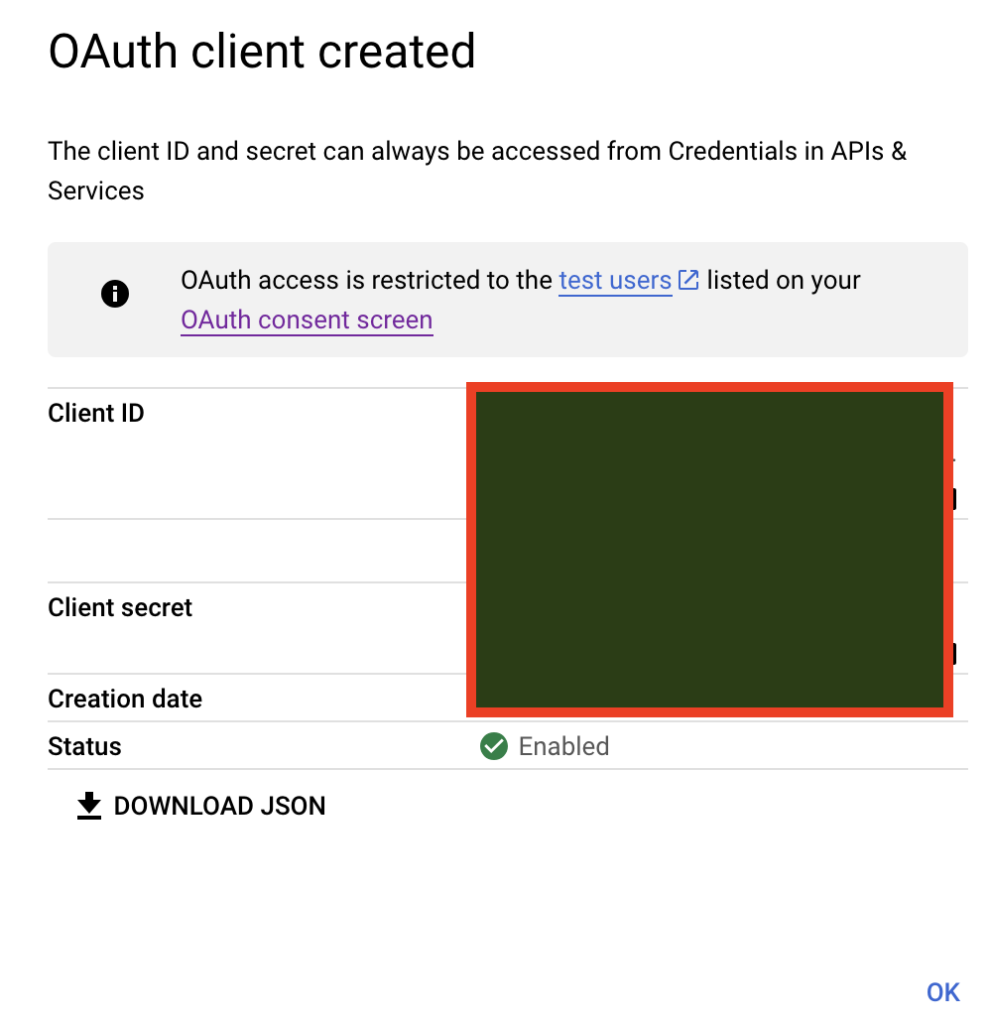
Within our project, We’ll grab google id and google secret and add them to a dot file of our env vars. should look like this:
NEXTAUTH_SECRET= #its like salt. used to ecrypt data
NEXT_PUBLIC_API_URL=http://127.0.0.1:3100/api
NEXTAUTH_URL=http://localhost:3100
MONGODB_URI=mongodb://localhost:27017/my-app
GOOGLE_ID= # google id, should look like this: <number>-<number and string>.apps.googleusercontent.com
GOOGLE_SECRET= #google secret <string>-<string>-<string>
Above env file contain MongoDB uri, next public api url nextauth secret and other env vars. Those all all relevant for our project.
Packages Dependencies
let’s install relevant npm pacakges:
npm install next-auth @next-auth/mongodb-adapter
Create Auth Route
In the following code we’ll be using nextjs ability to create api route and create a route that will be used by 3rd party oAuth provider google to redirect users after attempt of authentication. Meaning that google will receive users from us, Than take those users, Try to authenticate them then send them again to us to the url route we’ll be right here.
let’s create the auth file “api/auth/[…nextauth].js”, and here’s is the code:
import NextAuth from 'next-auth';
import GoogleProvider from 'next-auth/providers/google';
import { MongoDBAdapter } from "@next-auth/mongodb-adapter"
import clientPromise from "../../../utils/mongodb";
import type { NextAuthOptions } from 'next-auth'
import { NextApiRequest, NextApiResponse } from 'next';

const authOptions: NextAuthOptions = {
  session: {
    strategy: 'jwt',
  },
  providers: [
    GoogleProvider({
      clientId: process.env.GOOGLE_ID || '',
      clientSecret: process.env.GOOGLE_SECRET || '',
    }),
  ],
  adapter: MongoDBAdapter(clientPromise),
  secret: process.env.NEXTAUTH_SECRET,
  pages: {
    signIn: "/auth/login",
  },
  callbacks: {
    async jwt({ token, user }) {
      if (user) {
        token.role = user.role;
        token.org = user.org;
        token.subscribed = user.subscribed;
      }
      return token;
    },
    session({ session, token }) {
      /* Step 2: update the session.user based on the token object */
      if (token && session.user) {
        session.user.role = token.role;
        session.user.subscribed = token.subscribed;
        session.user.org = token.org;
      }
      return session;
    },
  },
}

export { authOptions };

export default async function hanlder(
  req: NextApiRequest,
  res: NextApiResponse
) {
  return await NextAuth(req, res, authOptions);
}
For google provider it’s also possible to extract userinfo (the scope we define earlier in the console dashboard of google oauth):
GoogleProvider({
  clientId: process.env.GOOGLE_CLIENT_ID,
  clientSecret: process.env.GOOGLE_CLIENT_SECRET,
  allowDangerousEmailAccountLinking: true,
  profile(profile) {
    return {
      // Return all the profile information you need.
      // The only truly required field is `id`
      // to be able identify the account when added to a database
    }
  },
})
Note that in above example we also allowed “allowDangerousEmailAccountLinking” which means google oauth will try to link multiple accounts together.
Session Provider
In order to use the session data following a successful authentication, we’ll want to use session provider given us by next-auth rect npm package.
// pages/_app.jsx
"use client";

import { SessionProvider } from "next-auth/react";


export default function NextAuthProvider ({ children }: Props) {
  return <SessionProvider>{children}</SessionProvider>;
};
Session Data In React
Now that we pass data of session into our ReactJS application we can use that data we hooks, in this case useSession hook provided by next-auth, extra data and session information and render cases accordingly. in below example show one msg for user that sign in and show different msg for a guest user:
import { useSession, signIn, signOut } from "next-auth/react"
export default function Component() {
  const { data: session } = useSession()
  if (session) {
    return (
      <>
        Signed in as {session.user.email} <br />
        <button onClick={() => signOut()}>Sign out</button>
      </>
    )
  }
  return (
    <>
      Not signed in <br />
      <button onClick={() => signIn()}>Sign in</button>
    </>
  )
Secure and Protected Routes
What about using an authenticated user to perform authenticated sensitive and secure actions, for example submission of data, collecting information, access to sensetive information, access to PII and much more. Here is one example to learn from but I want us to take a look at another example, right after.
import { getServerSession } from "next-auth/next"
import { authOptions } from "./auth/[...nextauth]"
export default async (req, res) => {
  const session = await getServerSession(req, res, authOptions)
  if (session) {
    res.send({
      content:
        "protected route, only accessible for authenticated users",
    })
  } else {
    res.send({
      error: "You must be signed in!",
    })
  }
}
Above example is of nextjs current most popular method of implementation, however nextjs 13 works on a new ay to perform backend api routes, here’s another example of usage of the session authenticated data than deciding what to do with the relevant user/guest.
import { getServerSession } from "next-auth";
import { authOptions } from "../../../src/pages/api/auth/[...nextauth]";

interface RequestInterface {
    title: String,
    description: String,
    activity_type: String,
    org: String
}

export async function POST(req) {
    // ...

    const { data }: RequestInterface = await request.json();

    const session = await getServerSession(authOptions);

    if(!session ) {
        return NextResponse.json({'error': 'Missing User Session'}, {'status': 500})
    }
    // ...
}
Common oAuth Errors
Url contain “error=OAuthSignin”
There are few reasons for that errors:
– The auth setup is not ready yet – you should wait few hours till everything is ready, after you configure everything – usually it happens faster.
– The auth credentials are not good, or not correct or empty. meaning that within your application, wherever you use the credentials – they are not passed correctely to the code. it could be via env vars or via other means. simply log those credentials (only in development! not in production). and test that the creds are correct and compare them to the credentials you have in your dashboard.

Lior Amsalem embarked on his software engineering journey in the early 2000s, Diving into Pascal with a keen interest in creating, developing, and working on new technologies. Transitioning from his early teenage years as a freelancer, Lior dedicated countless hours to expanding his knowledge within the software engineering domain. He immersed himself in learning new development languages and technologies such as JavaScript, React, backend, frontend, devops, nextjs, nodejs, mongodb, mysql and all together end to end development, while also gaining insights into business development and idea implementation.
Through his blog, Lior aims to share his interests and entrepreneurial journey, driven by a desire for independence and freedom from traditional 9-5 work constraints.
Leave a Reply